Save (keyboard shortcut ⌘S) performs the usual function of saving your RealCADD file. You can click Save at any time. By default, the file will save to the same location as it was opened from and will replace the original file. So if you save a file with new information in it, the original information will be replaced.
Tip: 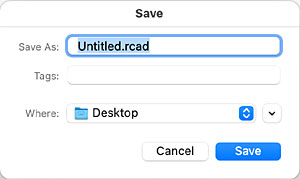 Each time you save a file, RealCADD places the old file in the Trash bin. So, until you empty your trash, earlier RealCADD files are still available. To get at them, open the Trash/Bin (double click its icon in the dock) and drag the file you want out of the trash on to the desktop; then you can put it where you want it to be and open it as a regular RealCADD file. The nomenclature of these files is the original name followed by the date and time it was saved, like this: xxxxxxxx.rcad_yyyy-mm-dd-hh-mm-ss. Once you empty your trash, these files are lost.
If you have started a new drawing (Plan or Workbook mode), it will be called Untitled.rcad and the first time you save it, this standard Save window will come up. Click on the ⌄ (down arrowhead) to the right of the "Where" box to expand the window so that you can navigate fully through your folder and file hierarchy, create a new folder etc. so as to save it where you want it to be. Click the up-down arrows in the "Where" box itself to go to a list of locations. And add a tag in the "Tag" box if wished. Then type a name for the file (xxxxxxxx.rcad) you file and save it. Make sure to retain the .rcad extension.
RealCADD doesn't have autosave, which is generally an advantage in a CAD program as you really don't want to save every move you make whilst drawing. As we discussed under Preferences – General..., you can set RealCADD to remind you to save at specified intervals – and this function can be toggled on and off on a drawing by drawing basis using the On-screen menus bottom left of the drawing window.
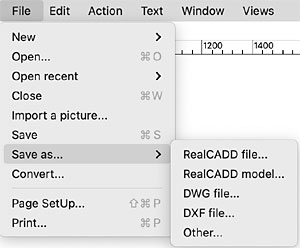
Save as... RealCADD uses "Save as" for two purposes: "Save as" and "Export".
 New name You can use "Save as" to save an existing file with a new name. This is useful if you are saving different versions of the same drawing as you progress with it, but don't want to lose the original.
New location You can also use "Save as" to save a file to a different location, with either the same name or a new name.
Mouse over the "Save as" menu item, slide across and click "RealCADD file...". The same "Save" window as above will come up, only this time instead of "Untitled" in the file name box, you will see the existing name of the file. Change this to the name you want to use, navigate to the place you want to save it to, and click "Save".
If you Save as in the original location with the same name, you will be asked if you wish to replace the original file with the new one.
Be sure to retain the .rcad extension when changing the name.
Note: You will only see Save as >> DWG file… if you originally had the Professional version and have been moving the "RCADtoDWG" file in to the same folder that contains your RealCADD application
- Save as > RealCADD model…
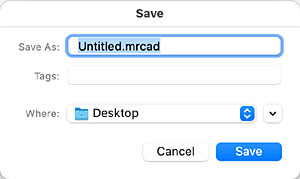 A RealCADD model (extension .mrcad) is a special RealCADD file that acts like a template. So you would create a new plan with the page setup, preferences, scale, layers etc. that you use regularly, together with (if wished) a border, title box and any other things that are common to you drawings.
Then save it as a RealCADD model. The same standard "Save" window comes up except that the file name will be "Untitled.mrcad" (whether or not is an existing file or a new file). You can expand the window as needed and navigate to the location you wish to save the file to as usual. Be sure to retain the .mrcad extension when saving.
To open the model, use the "Open" menu item in the usual way. It will open as an untitled file. Use the Save function to save it as a normal RealCADD file with the name that you want.
I find it convenient to have all my RealCADD models in a separate folder (mine is called "Templates"). I have models for all the page setups I use at all the scales I use – for example a much used one is A3 1-10.mrcad which opens a drawing with the page set to A3 size, scale 1:10, complete with the layer setup that I normally use, a border and title box.
- Export
- RealCADD also uses "Save as" to export a file to a different format.
Three options are available: DWG file…, DXF file… and Other… (Other… expands to further options).
Note: You will only see "DWG file…" if you originally had the Professional version and have been moving the "RCADtoDWG" file in to the same folder that contains your RealCADD application
 DWG file...
- DWG. (Drawing). Only available in the Professional version of RealCADD (v4.40 and earlier – see Note on the Home Page. It is one of the most commonly used design data formats, found in nearly every design environment and is the native file format for AutoCAD data files. It allows data interchange over a wide range of platforms and programs.
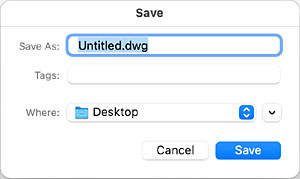
When you click "DWG file…" it will bring up the standard "Save" window shown right where you name the file and select the location you want to save to. You can expand this as usual by clicking the ⌄ (down arrowhead) to the right of the "Where" box, to select the location to save to, create a new folder etc; and by clicking the up-down arrows in the "Where" box itself to go to a list of locations. By default the file will be named "Untitled.DWG" (note .dwg and .DWG are interchangeable), whether or not the file you are exporting from has a name. You can change the name to one of your choosing. Make sure to keep the extension.
Once you are happy with the name and the location you are going to save the file to, click "Save".
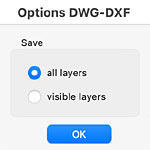
If the drawing has layers, some of which are visible and some aren't, the little window shown far right, will ask whether you want to save just the visible layers or all the layers.
 DXF file...
- DXF. (Data eXchange Format). DXF predates DWG and is a data file format developed by Autodesk for enabling data interoperability between AutoCAD and other programs. It is still in very common use and, as with DWG, enables data interchange over a wide range of platforms and programs.
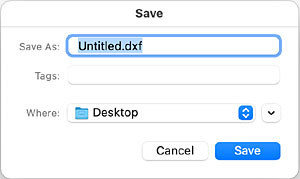
When you click "DXF file…" it will bring up the standard "Save" window shown right. You can expand this as usual by clicking the ⌄ (down arrowhead) to the right of the "Where" box, and up-down arrows in the "Where" box to select the location to save to, make a new folder etc. By default the file will be named "Untitled.DXF" (note .dxf and .DXF are interchangeable), whether or not the file you are exporting from has a name. You can change the name to one of your choosing. Make sure to keep the extension.
Once you are happy with the name and the location you are going to save the file to, click "Save".
If the drawing has layers, some of which are visible and some aren't, the little window shown far right, will ask whether you want to save just the visible layers or all the layers.
- Other...
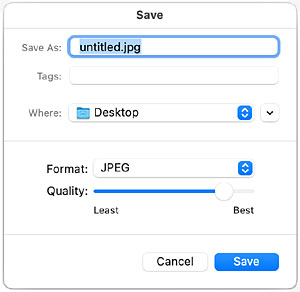
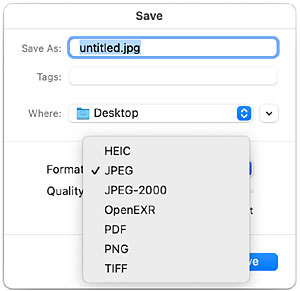
- Other brings up a Save window, with a drop-down menu for the options available (shown here below left with JPEG selected) – clicking the drop-down menu will give you the export choices as shown below right.
RealCADD will save an image, in your specified format, that includes all the objects visible in your drawing (whether showing on the screen or not), at the current magnification (zoom) selected, with about a 5 pixel wide margin around the outside.
You will probably need to experiment a bit to get just the right balance of original size (the RealCADD drawing zoom) and the final size you wish to reduce the image to.
Set up the zoom of your drawing. Then, from the drop-down menu, select the format you wish to export to.
All of the available image formats, except PNG, also have further options to specify things like compression and image quality. Once you have selected the format you wish to export to, and the options to go with it, click the Save button. You may need to experiment a bit to get the right balance of file size and quality for your purpose.
You can expand the "Save" window as usual by clicking the ⌄ (down arrowhead) to the right of the "Where" box, and the up-down arrows inside the "Where" box, to create a new folder, select the location you wish to save to etc.
The default name of the file is "untitled.extension" (whether or not the file has a name). Change the "untitled" part to the name you want to use for your file. Be sure to retain the extension. Once you are all done, click "Save".